If you’re in the know on Notion, you’re probably already familiar with the app’s most basic functionality: using different databases to help organize your notes, projects, and tasks. Among the diverse Notion database choices, my personal favorite is the board database, thanks to its column-like structure and adaptable nature. Let’s delve into optimal strategies for maximizing the potential of a Notion board database and explore five innovative ideas for seamlessly incorporating it into your unique setup!
Best Scenarios for Using a Notion Board Database
At its core, the Notion board database is styled after the Kanban board method, which categorizes tasks by status. Organizing your database pages by status is the current default way a board database is arranged and is a great way to get started using this style of databases.
What a lot of people don’t realize though, is that you can change the property by which you’d like your board to be grouped by. Instead of grouping by the status property, you can have the database’s column’s grouped by date, topic, or even person assigned to a task. This flexibility in groupings creates a ton of possibilities for when to use a board database; basically anytime you want to view a set of data by columns.
To customize the property you’d like your board to be grouped by, just head to the board’s settings by clicking on the three dot button. Then go to “Layout,” and click “Group by.” Here you’ll be able to select which property you’d like it to be organized by – just make sure you’ve added the property to the board in order to select it.
Five Ideas for Using a Notion Board Database
Now that you understand how and why you might want to use a board database, let’s get into some different ways I’ve used it to organize my life or business.
1. Event/Project Timeline Checklist
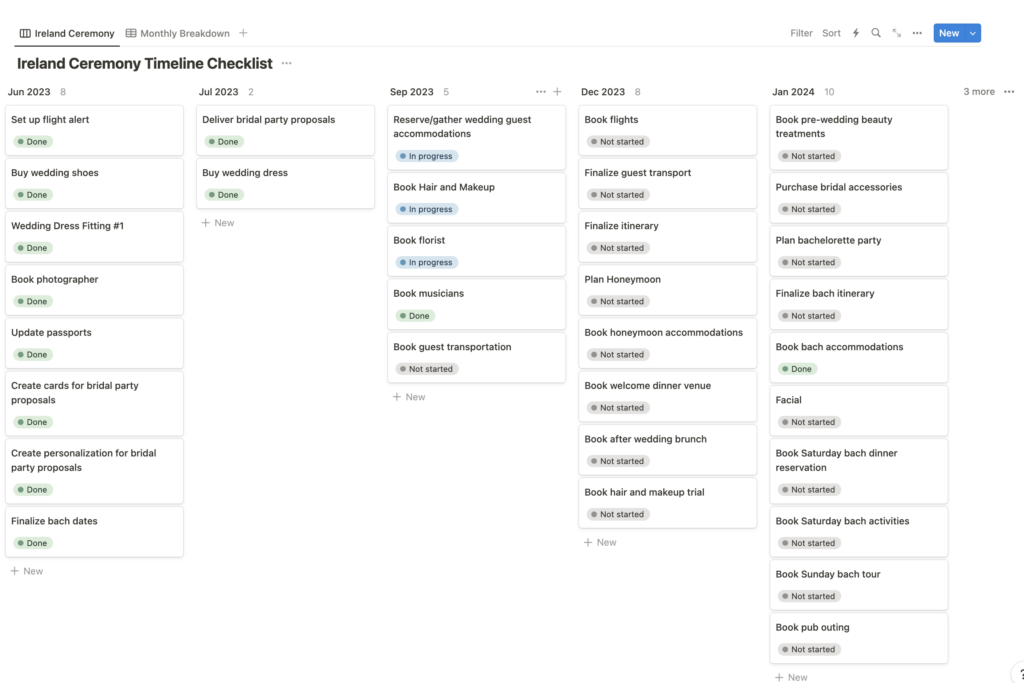
As mentioned before, the default way to break down a project with a board database is by status, but one of my alternate ways that I love to use is grouping the pages by date to create a checklist that’s more timeline or countdown based. This is especially helpful for tasks related to an event like a wedding, or for projects that have a very tight schedule and deadlines. Based on what works best for your scenario, you can have the columns grouped by a specific date, week, month, or by the year.
To create your own timeline checklist using a board database, first make sure you have a date property which you can use as your task’s deadline. Then head to the board’s settings by clicking on the three dot button, go to “Layout,” click “Group by,” and select the “date” property. Once that property is selected, you’ll see “Date by” underneath and can now select whether you want it to be done by day, week, month, or year.
2. Weekly Meal or Fitness Planner
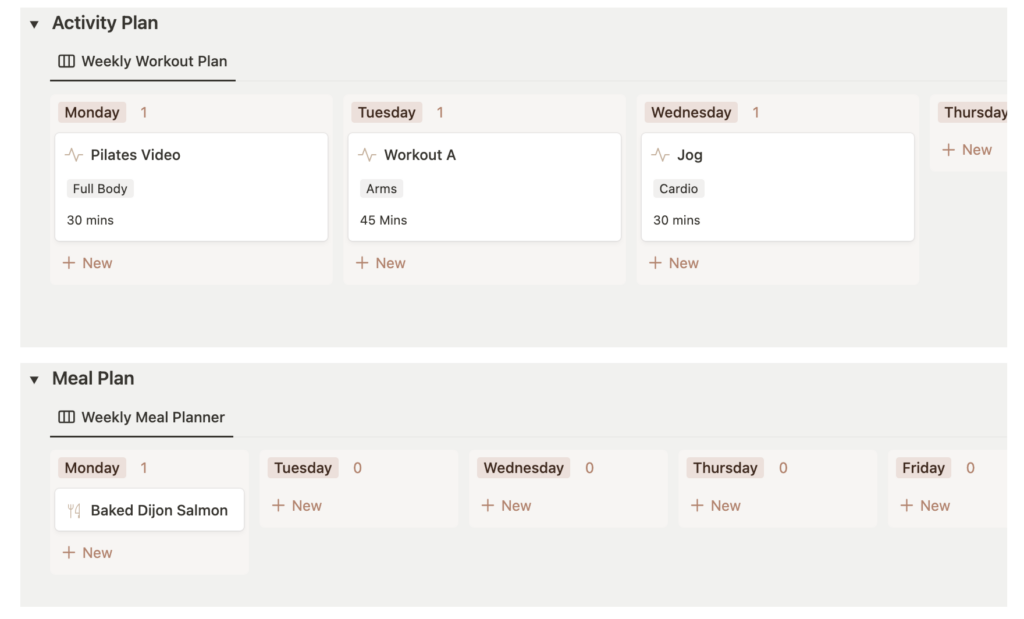
Another fun way I utilize a board database is by building a weekly planner for scheduling things that might differ day-to-day like meals or an exercise routine. Using a board database for this type of planner is great because I’ll often find myself reusing the same recipes or exercises on a weekly basis, but can easily shuffle them around depending on the day. It’s also convenient because I don’t necessarily need to schedule each recipe or workout I have stored in the database; those that I’m not using for the week can remain in an unscheduled column.
To setup this type of Notion board database, I will first create a Multi-select property type and enter each day of the week as an option. I utilize this type of property over a date property since I’m not as concerned with referencing specific deadlines and will be reusing it every week. Next head to the board’s settings by clicking on the three dot button, go to “Layout,” click “Group by,” and select the “Multi-select” property you entered your days of the week in. You’ll want to make sure it’s sorted by “Manual” and that your days of the week below are organized how you like starting Sunday or Monday. Then I’ll create my recipe cards, or workout routines, and when I’m ready to schedule them for the week ahead, I’ll just drag and drop them on one of the days to make my plan for the week.
3. Trip or Event Itinerary
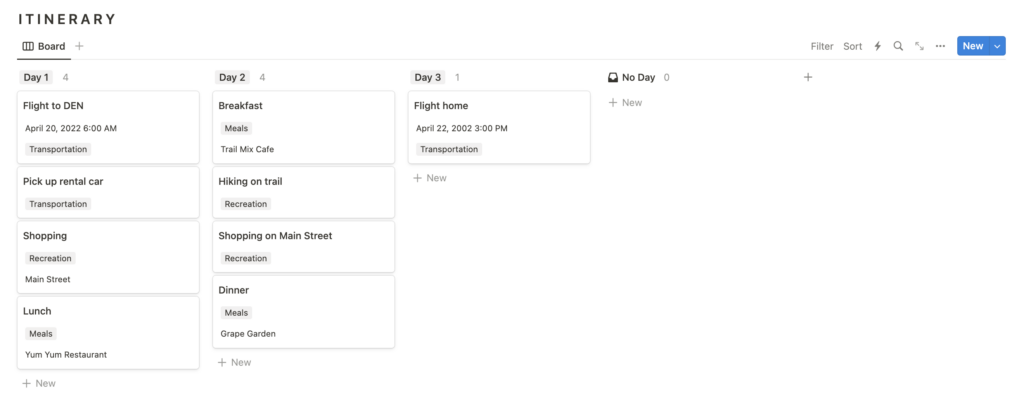
Along those same lines, another way to use a board database as a weekly spread setup is for organizing a trip or event itinerary. With this setup, I can get an at-a-glance view of the different events scheduled for each day and move them around as needed.
For this scenario, you can either set up your itinerary using a Multi-select property if you want to just simply use the days of the week of your trip/event, or you can use a date property so you can organize by the exact dates. Whichever way you prefer, just follow the steps in number one or two above to group your itinerary by your choice, then add all your different plans for each day.
I also typically add a text property and included a time estimate of each event so that I can be precise about planning my schedule. You can technically add a start time and end time in the date property, but I personally don’t love how it looks with repeating the date twice on one page so that’s why I stick to a text property for this.
4. Chore Chart or Team Project Breakdown
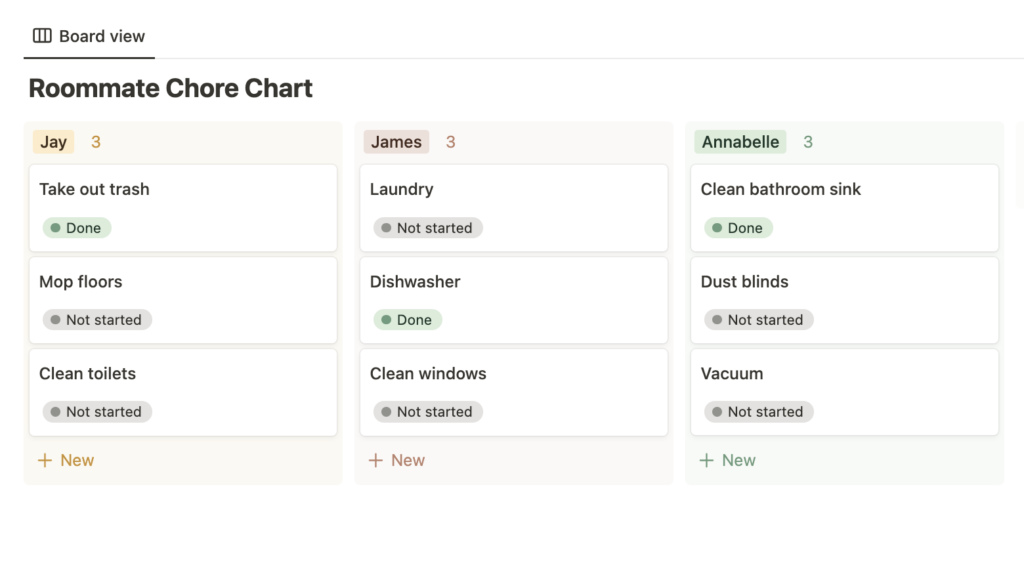
Another idea for using a board database would be use it as a chore chart if you’re looking for some household structure, or with that same idea for your business/school work, you can use it to break down team projects. By grouping the columns by person, you can easily get a break down of what each person is responsible for doing.
To create this type of board database, you can either add the assign property or add names to a select property. The person property can only be used for members on your Notion team, so if you don’t have team members on your Notion I would stick with a select property and add their names through that. Next head to the board’s settings by clicking on the three dot button, go to “Layout,” click “Group by,” and select whichever type of property you added to see the break down by person.
5. Goals Breakdown
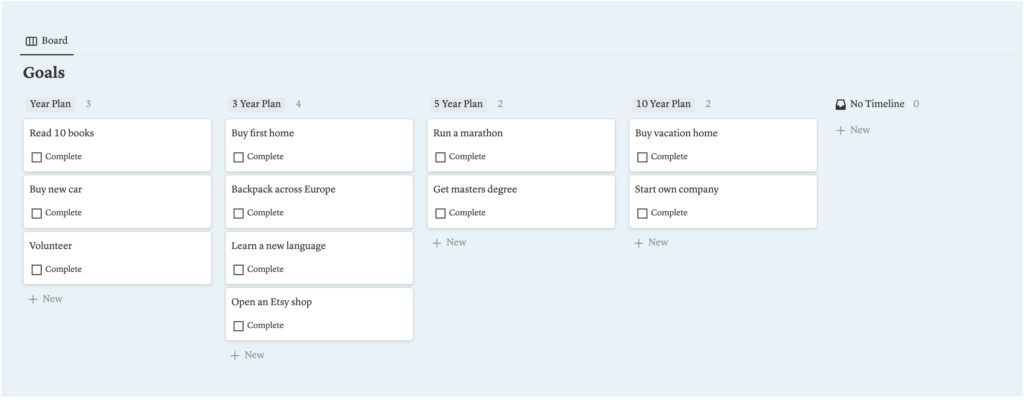
Finally, another great way to use a board database is to organize your goals. There’s two options on how you can break down your goals with a board; One, is similar to a timeline view, which is great if you have a bunch of goals for the year you want to break up by month, or maybe you have an intricate 5 year plan that you can organize by year. To create this type of board, review the steps in number one above.
The second option to view your goals would be broken up by categories, so that you can break up your goals by different areas of your life like personal, career, fitness, financial, etc. For this type of board, you’d just want to make sure you add a select property and add all your different categories there. Then you’ll head to the board’s settings by clicking on the three dot button, go to “Layout,” click “Group by,” and click that select property you created.
Conclusion
Beyond the foundational Kanban-style status arrangement, we’ve uncovered the board database’s true potential: customizable groupings that redefine its utility. By presenting five distinct applications of the board database, I aim to inspire your creativity and prompt ideas for unleashing its potential in your unique Notion setup. For those seeking aesthetic Notion templates featuring these diverse board types, feel free to explore my template shop page, where you can access a collection of both free and premium templates designed to cater to various lifestyles.
view comments
view more blog posts